Showing posts with label Nails. Show all posts

Thursday, May 21, 2015

Sharpie Nail Tutorial

Have you tried Sharpie nail art yet? If you haven't you are in for a delightful treat. These nails are not only easy to do, but they look amazing, and you can be very creative with your color choices. 


Supples:

  • Sharpies
  • Rubbing Alcohol
  • Top Coat
  • Nail brush/ Dotting tool
  • White Nail Polish

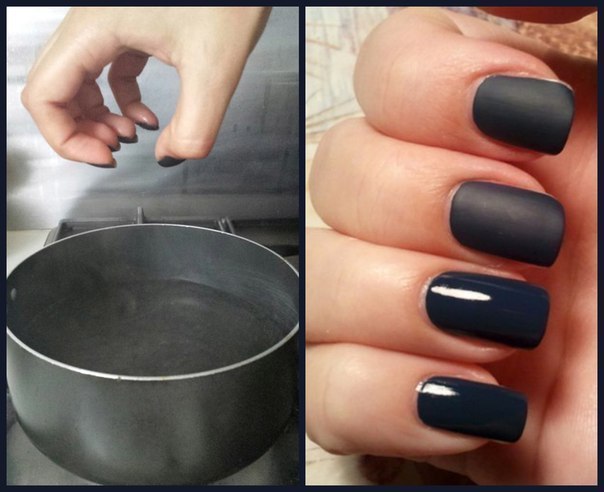
1. Apply white nail polish and let dry. 


2. Scribble on the nail with Sharpie. Any way you choose. 


3. Add a small amount of rubbing alcohol to the nail with your brush or dotting tool. Continue until you get your desired results. 


4. To lighten the color add more alcohol. 


5. Allow your nail to dry completely. Your nail will appear more marbled when it has dried. 


6. Now apply your top coat and your done. 


 If you enjoyed this tutorial, please scroll to the top of this page and click the add to my circle button above my photo. This will insure that you see all new posts from me. Thanks.


Monday, May 11, 2015

DIY: Matte Nail Polish

Hello! Today I have an easy nail polish tip for you. I love matte nail polish. Its a nice change of pace from the normal everyday shiny polish. It is hard to find and often more expensive to buy. That is wear this tip comes in. Did you know you could change any color of nail polish to a matte shade? Well I am going to show you how. 


Tools:

  • Polish of your choosing
  • Pot
  • Water
  1. Place water into your pot and place it on the stove over medium heat. 
  2. Paint your nails with your favorite color. 
  3. When the pot begins to steam, carefully hold your nails over the steam. Your hand should be around 8-10 inches away from the actual pot. You just want the steam to flow over your nails. 
  4. Please exercise caution as you can be burned if you are not careful. Do not hold your finders too close to the steam. If you are a child please ask a parent for help.
  5. Once your polish is dry, it will be matte. 


Wednesday, May 6, 2015

5 Things You May Not Know About Pedicures.

I am not a pedicure girl. Every time I go to the nail salon my nail artist Hung always tries to talk me into getting one. No doubt hes thinking "$", while I am thinking "No way".  


I have a few reasons why I am opposed to getting Pedicures. 

The first is no one touches my feet, The only person I allow to touch my feet is my daughter. She loves applying nail polish like most little girls and she loves giving foot soaks. I am not really sure where that came from but she asked for a foot bath last year for Christmas. No joke, we had a family movie night and she soaked, scrubbed, lotioned, and painted every pair of female feet in the room. Still this is often hard for me as I am extremely ticklish, but I tough it out for her.

The second reason is foot baths in nail salons are discussing. I mean if you really think about it, the foot bath and all of the foot tools have been used by hundreds of people. I don't care how often they soak and scrub their tools, I am not letting one come near my feet. When I was in Nursing School we discussed surgical tools and the sterilization process for them. Surgical tools are sent to a facility to be boiled and baked in special ovens made for the purpose of sterilization, at extremely high temperatures. If my nail salon is not doing this, then none of their tools are coming near me. 

I know that may sound a little over board, but if you think about it, it makes sense to want that level of cleanliness. Any time you have a pedicure done, you are at risk of getting a laceration from the tools used. Any opening in your skin is a passage way for bacteria to travel into your body. Gross I know, but its true. Do you really want to allow another persons, or over 100 peoples bacteria and entrance into your body? 

This is especially important for diabetics, as they have decreased feeling in their feet, a condition called Neuropathy. If a diabetic developed and opening in their feet, their risk of infection is double a persons without Neuropathy, as they can not feel the wound at all. This often allows the wound to grow and fester until the person discovers it, by this time, often the wound is very big and results in massive tissue destruction.  

Okay now that I got my nursing rant out of the way, lets move on 10 things you may not know about pedicures. 

1. Bacteria often harbors in the pipeing system where the water comes from. There is not cleaning that. So don't get a pedicure unless your salon has "pipe-less" foot baths. Also make sure your salon sanitizes before you began. 


2. To avoid an infection do not shave your legs for at least 2 days before your pedicure. Often you can have small nicks and cuts from shaving that you cannot see with the naked eye. These are another passage way for bacteria. 


3. Never allow the use of a callous scraper. In fact, the use of callous scrapers is illegal in most states. These work by scraping the callouses off of the feet similar to the way a vegetable peeler peels the skin off a potato. These often lead to nicks an cuts to the foots surface. 


4. Bringing your own tools is not safer. Unless you boil, bake, and sanitize after every use. Each time you use them they are exposed to the same bacteria in the bath. 


5. Always dry the areas between your toes. This is the ideal place for bacteria growth. Drying them immediately after your soak will decrease this growth. 


If any of the reasons above have not changed your thinking on pedicures, saving some cash might. My salon charges $55 for one. I wont speak for you all, but I know I can use that money else where. Here is a great video by Womens Health, on how to give your self a pedicure at home: 


Wednesday, March 11, 2015

DIY Sand Textured Nails! Super easy.

Hey everyone! I hope you all are having a wonderful day today. Here in Wv all the snow has finally melted and it was 60 degrees F here. It was a nice wonderful day, hopefully spring is right around the corner.


With that in mind, I am happy to give you guys a super fun spring and summer nail tutorial. These are so easy to do and the results are fantastic. Best of all the only thing you need is your favorite polish color, some baking flour, and a top coat. One thing to keep in mind is that the  flour is going to make whatever color you choose a bit lighter.

* Place a few tablespoons of flour in a small bowl or container. Something you can easily dip your finger into.

1. Coat your finger in polish.

2. Dip your finger in a bit of the flour.

3.  Count to 5 slowly then shake off the excess flour.

4.  Allow to dry then apply your top coat.

* For extra sass apply a glitter top coat.


I love the texture this gives to the nail. They remind me of summer. I hope you all enjoy this tutorial. Share your pictures if you try this out. I would love to see them.

Saturday, March 7, 2015

Save Your Nail Quick!

It always happens. Your in a hurry on your way out the door to head to the store, pick up the kids, or get to a meeting. In your haste, your nail snags and rips. Great! You have spent weeks patiently waiting for your nails to grow and as soon as they are about the right length, you rip one. I usually get so frustrated that I just chop them all off. Well here is a solution for you. I have tried this and it does work.

Supplies needed:
1. Tea Bag
2. Nail polish
3. Scissors
4. Tweezers
5. Nail glue
6. Nail file


1. Cut your tea bag. Empty tea into trash and cut a small portion of the bag to fit over the rip of the nail.  (save the remainder for any future patch needs).

2. Apply nail glue to the nail area and place tea bag section over rip, using tweezers. I like to apply a bit of glue to the top of the bag after I have it on my nail. I just feel like it provides extra security. 

3. Wait a few minutes for the glue to dry. When it does buff the sides of the tea bag to remove any excess glue. Basically you just want to make the nail as smooth as possible without removing the tea bag patch. 

4. Now just paint your nails your favorite color and your ready to go.