Showing posts with label Skin care. Show all posts

Monday, May 18, 2015

Beautiful uses for Witch Hazel

Hey everyone! Today I want to share with you one of my secret weapons. Witch Hazel is a very affordable remedy for many beauty ailments. 


I bet you are wondering what the freaky plant above is. Yep its the Witch Hazel flower. It may not be a natural beauty, but it will do beautiful things for us. 


Witch Hazel Uses:


1. Acne:

One of the best uses for Witch Hazel is its treatment of acne. It will reduce the inflammation of a blemish. If used daily it can reduce and control breakouts. Apply to a cotton ball and dab on affected areas. 

2. Skin Refresher:

Witch Hazel is the perfect skin cleanser. Its wonderful on hot summer days to cool down your skin and remove excess oil. It will leave your skin feeling fresh and cool. 

3. Psoriasis and Eczema:

Both of these conditions can be tiresome and tedious. If you have either Witch hazel will calm down any inflammation caused by these and prevent itching and redness. 

4. Bruising:

Applying Witch Hazel to bruises can help lessen their appearance and help them disappear faster. 


5. Moisturizer:

When used after a shower, Witch Hazel can help seal in moisture and keep your skin from drying out. 

Thursday, May 14, 2015

20 Basic Beauty Tips You May Not Know

1. The best way to remove excess oil from your skin in hot summer months is by using blotting papers. They remove oil from the skins surface leading to fewer breakouts.


2. When selecting a new foundation, swatch it on your neck under your jawline. Pick the shade that matches your skin tone the best, and you will be good to go. Never test your foundation on your hand, it receives a different amount of sunlight then your face. It will not give you the look you want.


3. You can use a light exfoliate daily. Be sure to pick on that is easy on the skin and use it lightly. Exfoliation will remove dead skin cells from the face, leaving you smooth and glowing.

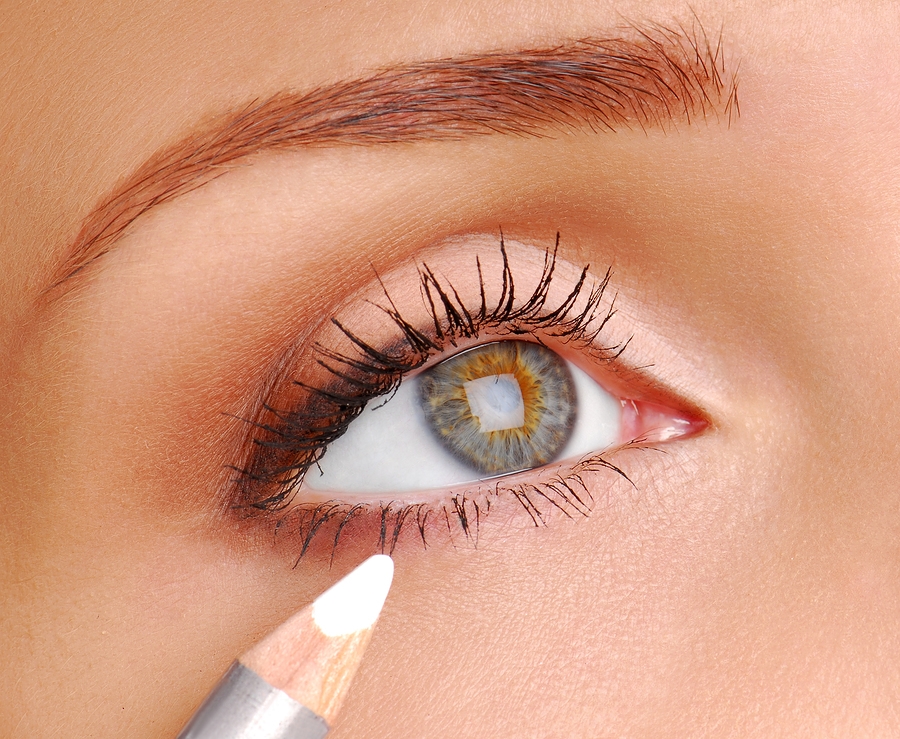
4. Using a flesh colored liner in your waterline will make your eyes appear bigger and brighter.


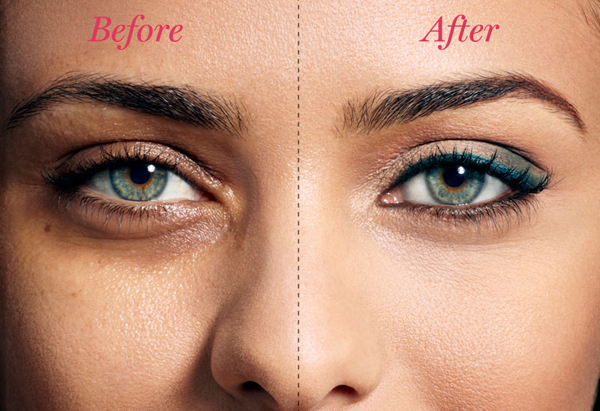
5. Apply concealer to under eye circles after applying your foundation for better coverage. 

6. Apply products to the delicate skin under your eye with your ring finger. It is the weakest and will apply less pressure. 

7. Use a darker shade of concealer to cover up under eye bags. Darker colors recede, meaning they make the bags look smaller. 


8. Use colors that are similar like light brown and dark brown on your eyes to create dimension.


10. Rub an ice cube over puffy eyes in the morning to reduce swelling. 

11. Red heads should use natural eye tones that wont compete with their hair color. 

12. Always keep summer makeup minimal. Sheer makeup will stay on better. Try a BB cream instead of full coverage foundation. 


13. Use excess eye cream on your cuticles. The more hydrated they are the stronger your nails will be. 

14. To keep hair color from fading in the summer, apply conditioning treatments every other week. 


15.  If you have on shimmery eye shadow, use a matte lipstick to even it out. 

16. Wear white eyeliner to make eye redness fade.


17. You can use red lipstick as a stain. Simply apply it then blot it off. 

18.  Clean makeup brushes 1 a week to fight bacteria that may lead to pimples. 

19. Not using eye liner on the inner 3rd portion of your eye will make your eyes appear bigger.


20. Always apply a moisturizer before your foundation, if you have dry flaky skin. If not foundation will slide under the flakes making them more noticeable. You should also exfoliate 2x a week. 


Tuesday, May 12, 2015

Maybelline Master Prime Vs. E.l.f Poreless Face Primer

Hey beauties! Today I have a Primer Showdown for you. When I was at Ulta last month I bought Maybelline's Master Prime Blur and Smooth. It was $9.99. I like it pretty well, but when I was out at old navy 2 weeks ago I picked up Elfs Poreless Face Primer, mostly because I was there, It was there, and I have been wanting to try it. It was $8. I will tell you now that walmart and elf both have it on their web site for $6, which means that Old Navy is all about the pocketing. I'm really not surprised about that. Just Saying! Now I hope you guys realize just how much I love you all, because I am going into the nitty gritty with these two and I will hold nothing back. 


I got the blur and smooth. I also got the wrong image when I made this. Sorry. 

Okay lets start the play by play!

Round 1:

You get 1 oz with the Master prime, however with Elf you only get 0.48oz. Elfs is less then 1 oz. Though the packaging is big enough to hold an ounce, probably more to be honest. So if you do the math you will see with Maybelline you are paying $5 for half an ounce and with elf you are paying $6 for even less then that. Since Elf is suppose to be a low end beauty manufacture, I am less then impressed.  Round 1 goes to Maybelline!


 Round 2:

I was super excited about elfs primer having a pump! To me that is a bit of a plus. However, I am not happy with being miss led. When you buy this, it is in a sealed plastic box. There is no testing first. I know why now. As you can see from the picture below, I have discovered a secret that I am betting elf does not want us to know. Over a 3rd of the bottle is empty. I was looking at the bottle trying to figure out why it felt so light. That's when I noticed a small hole in the bottom of the blurry plastic case. Its made to look like you get a full bottle, that's why the plastic is blurry, it makes the white plastic look like product. So I untwisted it and pulled the pumping mechanism out of the blurry plastic casing, flipped it over and discovered the truth. 


The arrow above is pointing to the very bottom of the plastic plug. It extends up the the darker ring above the arrow. Below, I actually marked it on the plastic tubing, this way you can have a clearer visual. Needless to say Round 2 also goes to Maybelline! I need a company that is not only affordable but that I can trust. 


Round 3:

This is the final round and its all about results. I have wore  Master Prime for around 3 weeks every day. It fills in the few lines I do have and does wonders on blurring my pores. I do have some bigger ones on my cheeks close to my nose and on my nose. Once I apply this you are not going to see any of them. I don't have to work on it and it stays all day. I have been to many of my daughters softball games and practices in this and even in the heat Maybelline holds up.

I wore Elfs today, I was at my daughters game from 5:30-7:00. I had not been out there for more then 30 minutes and I could literally feel my makeup sliding down my face. I looked in my purse and found a Kmart flier, I folded it up grade school style to make a fan. I had to fan my face the entire game, even with that by the time I left the game my makeup was a mess. It looked horrid! When I applied it, I still had pores showing on my nose and I could not get them covered, but it was to late to start over so I just went with it and hoped no one would notice. 

So you guessed it Round 3 also goes to Maybelline! I never thought I would say that. I usually love elf products and the savings that come along with them. I told you I would tell it to you straight and I did. I will never purchase this elf product again. I am going to wait until winter and try it again then. I am hoping that it will stay better in the colder weather. If that fails, then at least I can push down the plug and reuse the pump bottle. So my $8 will not be a total waste. 


You can find these products here: Maybelline  /  Elf

If you enjoy reading my post please scroll up to the top of this page and click the button above my photo to join my circle. This way you will never miss a post and it will help my blog grow. Thank you for your continued support! I enjoy sharing all of my experience with you. 

Thursday, May 7, 2015

DIY: Painlessly Remove Skin Tags. Fast and Easy!

Hello everyone! Today I have a quick and easy skin tag removal treatment for you. If you are a person who has suffered or is suffering from skin tags then you know how much of a pain they can be.  Skin tags are unsightly and often make the person feel self conscience. So I decided to share this tip in hopes of helping anyone who may suffer from them. 


Apple Cider Vinegar:

The main ingredient you will need for this DIY is Apple Cider Vinegar. Apple Cider Vinegar is a common house hold item used for recipes and even cleaning. In many cases it is also used for the treatment of some ailments. The best thing about Apple Cider vinegar is that it is versatile and cheap.


Whats a Skin Tag?

Skin tags are small, harmless growths of extra skin. They often hang from the body part or region where they are found. They are most commonly found on over weight people, but anyone can get them. No one knows the exact cause of these growths, but doctors agree they are benign and harmless. 

Most of the time Skin tags are painless. It really depends on their location on the body. I have a friend that had one on his inner thigh. Every time he would work out or run the tag would rub against his shorts. Over time it became very sore and would even rip open and bleed. For him it was very painful. He decided to tie a piece of string around it tightly, this closes off the blood flow to it. Eventually it fell off. It took 3 month though and was very uncomfortable. 

The method  I am telling you about today is pain-free and relatively easy. Here is what you will need:


  • Soap
  • Apple Cider Vinegar
  • Cotton ball
  • Tooth Pick
  • Bandage
  • Vaseline

How to remove a Skin tag with Apple Cider Vinegar:

  1. Clean the area around the skin tag with a mild soap.
  2. Dry off the area.
  3. Gently scratch the skin tag with a tooth pick. You really want to be gentle, do not scratch until the point of bleeding. Just enough to roughen up a bit of the skin to allow the vinegar to penetrate the tag. 
  4. Apply Vaseline to the area around the skin tag , this will keep that skin protected from the vinegar. 
  5. Cut your cotton ball to the size of your skin tag. 
  6. Soak a cotton ball in Apple Cider Vinegar and then squeeze out the remainder. 
  7. Now apply the cotton ball to your skin tag. 
  8. Cover it with a bandage. 
  9. Leave it in place over night.
  10. Remove the bandage and cotton ball in the morning, then wash the area with water and soap.
  11. Repeat nightly for 3-4 days. The skin tag will darken and fall off. 

Now after the removal process, there will be a red spot left where the tag fell off. This is from the blood supply that use to be in the area giving life to the tag. It cna take up to a year for this spot to fade back to your natural skin tone. However a dab of concealer will even it out nicely, if its in an easy to spot place. 

I hope this tip helps you or a friend who may suffer from skin tags. 

*Also before you try this method, talk with your doctor to insure you do indeed have a skin tag. Do not use this to remove moles because (in rare cases) they could be cancerous. I do not want anyone to risk the spread of cancer, so simply ask your doctor to take a look and confirm it is a skin tag. 

Oil Cleansing

Oil cleansing is a method of removing dirt and grime from your face without the use of harsh chemicals. It can be used on any skin type, even oily. This little trick can do wonders for your skin and will keep your skin glowing. 

Here's how:

1. Cover your face in olive oil. Massage gently into your skin. 

2. Soak wash cloth in hot water. You need it to be very hot, but only as hot as you can handle. Please don't over heat your cloth and burn yourself. 

3. Apply the hot cloth to your face for 15 minutes.  I like to lay down and just relax for a few during this step. 

4. Then remove all the oil with your cloth. 

After a few times you will notice that you can barely push on areas of your skin that have black heads and they will easily just pop right on out. Just be sure to do this once after your 15 minutes of heat. 


Wednesday, April 22, 2015

DIY Blackhead Removing Strip! *Super Easy*

Hey guys, today I have another super easy tutorial for you. This is another Pinterest find. When I stumbled across it I knew I needed to share it with you. I often struggle with black heads on my nose. It can be a very difficult place to clear of them, with all its grooves and such. 

Here is a easy and cheap way to make your own black head removal strips. 

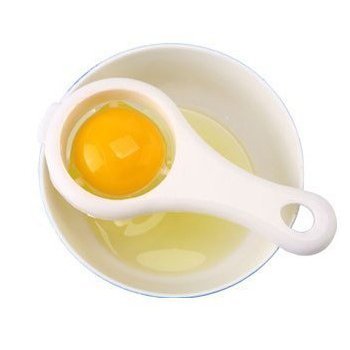
1. Egg white
2. Paper towel cut into small strip
3. bowl to mix it in. 

1. Separate your egg white and place it in a bowl. 

2. Dip your homemade strip into the egg white. 

3. Remove the excess egg white from the strip. 

4. Apply to your nose and wait 10-15 minutes to dry. 

5. Pull off slowly starting on the side. 

That's it. Now your nose should be free of many black heads. 

Vivawoman.net

Thursday, April 9, 2015

Cheap and Easy Summer Soothing Face Masks

Summers right on our heels and will soon be wrecking havoc on our faces. To help with this here are a few mask you can wear to help heal and soothe your skin.


Cucumber Mask: 


demandstudios.com


Cucumbers contain Silica in its juice. Silica not only improves the health of your skin but also your complexion. Cucumber juice helps balance your skin, keeps it moisturized, and soothes reddened skin. Just add 2 Tbsp of cucumber juice and mix it with rice flour to thicken. Apply and allow to dry. Wash off with cool water and pat dry. 


Tomato Mask:


cf.ltkcdn.net


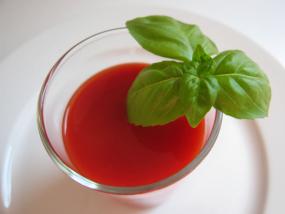
Tomato's are also high in antioxidants. These help soothe sunburn, rashes, and acne. Tomato juice will also restore your natural glow. Apply 2 tablespoons to tomato juice to your face, let dry, and wash with cool water. 

Oatmeal Mask:


natural-homeremedies-for-life.com


Oatmeal is a great anti-inflammatory. It soothes dry, itchy, irritated skin. Oatmeal also is wonderful for acne, it absorbs excess oils in your skin, without drying it out. Mix  1/2 cup hot water with 1/3 cup of oatmeal. Let sit for 1-2 minutes. Add 2 table spoons of plain yogurt and mix. Apply to face for 10-15 minutes, then rinse with warm water. 


Aloe Vera Mask:


tumblr.com


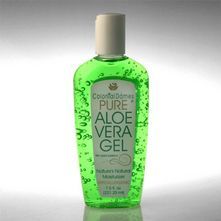
Aloe Vera Gel lightens skin tone and soothes sunburn. It puts a protective layer on your skin to replenish and moisturize dry sun damaged skin. Apply to your face for 10 minutes, wash off with cool water. 


Watermelon Mask:


www.maangchi.com


Water Melon is full of Vitamin C & A. Since Water Melon is mostly composed of water, it acts to re-hydrate your skin ad give is a radiant glow. Clean your face, then apply Water Melon juice with a cotton ball. Let sit for 15 minutes and rinse with cool water.


Reminder: Don't miss out on our Makeup Giveaway. We have 9 great items for 1 lucky person to win!  Please click on the image below to check out how to enter. Its super easy :)


Tuesday, April 7, 2015

DIY: Vitamin E Makeup Remover Pads.

Hey everyone! Today I ran out of my homemade makeup remover pads, so I thought I would show your guys how I make them. These are super easy to make and will leave your skin feeling baby soft and clean.


There are a lot of recipes with many variations on how to make these. I choose to use ingredients that I know will get the job done, while also leaving my skin clean and refreshed. That is why I choose to use Vitamin E oil in my wipes.


Vitamin E oil has many beauty benefits. It treats scaring by penetrating the pores. This is great for people who have scarring from acne on their face. It really helps to remove the redness of scars and is often used on burns for this reason. Another reason is that it improves the texture and helps prevent skin irritations. If you check your moisturizing cream, 9 times out of 10 one of the ingredients will be Vitamin E oil.

Now that you know a little more about Vitamin E, lets jump into the tutorial.


What you need:


  • Coconut Oil
  • Vitamin E Oil
  • Purified Water
  • Baby Wash/Shampoo
  • 1 Package Cotton Rounds
  • Container with air tight lid


You may have already guessed that I will be using a double broiler to mix all of this together. You can use a bowl and place it in the microwave. I choose not to do this with any project containing oils or petroleum products for 2 reasons. 

The first is that it takes forever. You have to put it in the microwave over and over for 30 second increments until you get the Cocoa Nut Oil to melt. Secondly, its not that safe, all microwave styles vary in the amount of energy they create. If you cook your oil too long in the microwave, it can catch fire. I don't know about you, but I don't need any of that going on in my home. 

When you use a double broiler, it only takes a minute or so to melt and you can keep your eye on it while you prep for the rest of the project. 


1. Prepare your double broiler. I did not have a large glass bowl, so I used a small cake pan this time. Also, place your cotton rounds into your container. 

2. Measure 2 cups of filtered water, 1 Tablespoon of Cocoa Nut oil, 1 Teaspoon of Vitamin E oil, and 2 Tablespoons of Baby Wash.
My 1 cup measuring cup ran away and I could not find it :)


This is the baby wash. 


3. Place all in your double broiler pan. 


4. Turn on the burner to low medium heat. Stir occationally until melted. 

This is mesmerizing to look at. Like magical glittery goodness. Don't worry you wont have a sparkly face after using.


5. Carefully pour all of this into your container. 


6. Now push the cotton rounds down to absorb all the mixture.  It will be very warm so be careful. 


8. And you are all done. 


These pads are amazing. I only have to use one to remove all of my makeup. The best thing about them is the way your skin feels after. I don't think I can describe just how it feels, but my skin feels very smooth, soft, and super clean. Way better then any makeup wipe I have ever used. I really hope you will give them a try. You wont regret it. 

Here is a picture of one I used to remove my make up. I know some may think its gross, but I just wanted to show you how well they work. So if this sorta thing grosses you out, back out now. lol


Here it is: This baby takes off all my eye shadow, foundation, blush, lip stain, eye liner, mascara, and brow liner. Its truly a gem and makes my night time routine so much easier. 


Reminder: Don't miss out on our Makeup Giveaway. We have 9 great items for 1 lucky person to win!  Please click on the image below to check out how to enter. Its super easy :)


Friday, April 3, 2015

DIY: Say Bye Bye to Puffy Eyes

Well... not really your eyes but under eye puffiness and swelling. It seems like every spring I wake up to puffy eyes in the morning. It drives me crazy. I am pretty sure its my allergies. My darn allergy issues just love making me look like a puffer fish. Over the years I have found a few little secrets that help. Today I am sharing them with you. 


  1. Egg Whites


  • Will tighten up the skin under your eye. Apply egg whites on your puffy skin. You can also use this on other puffy areas you may have. Leave on for 15 minutes before washing off.  

     2. Cucumber


  • Cucumber is just great for our skin. It minimizes pores and refreshes our skin. They also tighten and firm our skin. Wash and remove the skin from a small cucumber. Grind it up in a food processor or blender. Squeeze  the cucumber over a bowl to remove the juices. Apply the juices to problem areas with a cotton ball. Allow to dry and then rinse with cool water. 


     3. Astringent


  • I feel like this is the fastest way for me. I use it daily before applying any products to my skin. Astringent will tighten under eye bags while also minimizing pores. 


    4. Water


  • We all know that drinking water is important for us for many reasons. This is also true for under eye bags and puffiness. Often dehydration can be the cause of these eye sores. Try to drink 8 glasses of water a day to keep the puffiness at bay. 


Reminder: Don't miss out on our Makeup Giveaway. We have 9 great items for 1 lucky person to win!  Please click on the image below to check out how to enter. Its super easy :)


Tuesday, March 31, 2015

DIY: Treating Sun Spots Naturally

Hey everyone! I have another DIY for you today. This is a special request from one of our readers. If any of you want to see something in particular, just leave me a comment below or on Facebook. 


Age Spots are an annoyance for many people. Age spots are also called Liver spots, Sun spots, or  Lentigines. They are generally caused by repeated sun damage to the skins surface, but can also be caused by impaired liver function or nutritional deficiencies. 

Age Spots appear on the skin as flat, yellow or brown discolorations and are usually harmless. The are most commonly seen in people over the age of 40. 


Here are a 4 ways to treat these at home:


Lemon Sugar Scrub

Gethelponline.org

Things You'll Need:

  • Lemon juice
  • White granulated sugar
  • Small bowl
  • Cotton ball
  • Cool water
  • Soft towel

1. Pour 1 Tbsp of Lemon Juice into a small bowl. 

2. Add 1/2 tsp of granulated sugar to the bowl and whisk together.

3. Once combined, dab a cotton ball into the mixture and apply to your sun spots. 

4. Allow to sit for 10 minutes. 

5. Rinse with cool water, pat dry with a towel, and apply a moisturizer. 


  •  Repeat once a week until  sun spots fade.
  • The acid in the lemon will fade the spot while the sugar exfoliates the skin. 


Apple Cider Vinegar and Onion: 


beautywingman.com


1. Finally chop 1 small onion. Use a strainer or cheese cloth to push out the juices from the onion.

2. Place in a small bowl with with and equal amount of Apple Cider Vinegar. Mix.

3. Dab on skin with cotton ball. Leave on for at least 30 minutes. 


  • Repeat daily until sun spot is gone. 


Castor Oil:


Phrophro.com


1. Simply rub Castor oil onto the age spots in the morning and at night. 


  • Spots should be greatly improved in 1 month. 


Aloe Vera Gel:


errormark.com


1. Simply rub onto area twice daily. 


  • Improvements should be seen in 1 month. 


Reminder: Don't miss out on our Makeup Giveaway. We have 9 great items for 1 lucky person to win!  Please click on the image below to check out how to enter. Its super easy :)